Checkins are available under the Records tab. The  button should be press in the ribbon.
About Checkins
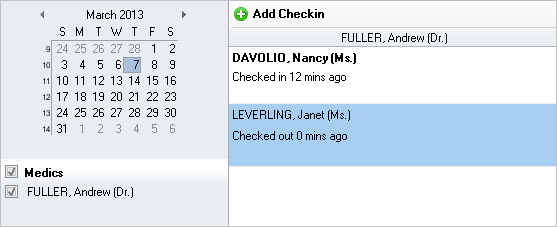
The represent the patients in the waiting room per doctor. Typically checkins are created by the Front Desk. The medic views in the program what patients are in the waiting room and chooses which to admit, through the program.
Checkins can be added in this viewer or from patient appointments in the Calendars

Filters
The filters are available in the left panel. You can filter the checkins date and by medic
Multiple Medics
The program supports the display and use of multiple medics. This way the Front Desk can manage the waiting room of one or more medics.
Checkin states
1. Checked in - puts the patient on the medic's wait list
2. Admitted - means that the patient is consulted by the medic
3. Checked out - means that a checked in or admitted patient leaves the clinic or hospital
4. Canceled - the patient canceled the appointment
5. No Show - the patient did not show, without notifying the clinic
How to use
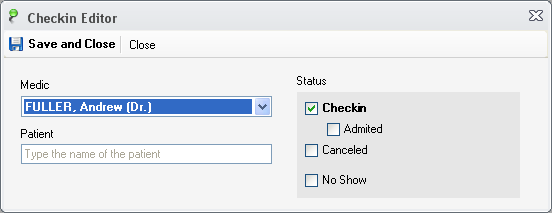
1. Check in a patient - click the Add Checkin on the toolbar or right click on a medic's list and select Add Checkin
Next select a patient in the Patient field, and press Save and Close

2. Admit a patient - right click on a checked in patient and select Admit
3. Check out a patient - right click on a checked or admitted patient and select Check out
You can add Canceled or No Show by adding a new check in, and in the editor checking Canceled or No Show